
 by
by Product Photography for UK Online Stores: A Practical Guide to Boosting Sales
17 Aug, 2026Imagine a customer scrolling through your shop on their phone at 10 PM. They have three seconds to decide if they care about your item. If the photo looks blurry, dark, or staged in a cluttered bedroom, they’re gone. In the UK’s competitive ecommerce landscape, your images are not just decoration; they are the primary salesperson. For many small and medium-sized businesses, the difference between a click and a cart add often comes down to image quality. You don’t need a studio worth a fortune, but you do need a strategy that respects how British shoppers browse and buy.
Good product photography does more than show what an item looks like. It builds trust, reduces return rates by setting accurate expectations, and communicates value without saying a word. Whether you sell handmade ceramics in Bristol or tech gadgets in London, your visuals must work hard. This guide breaks down exactly how to capture images that convert, specifically tailored for the nuances of the UK market.
Understanding the UK Shopper’s Visual Expectations
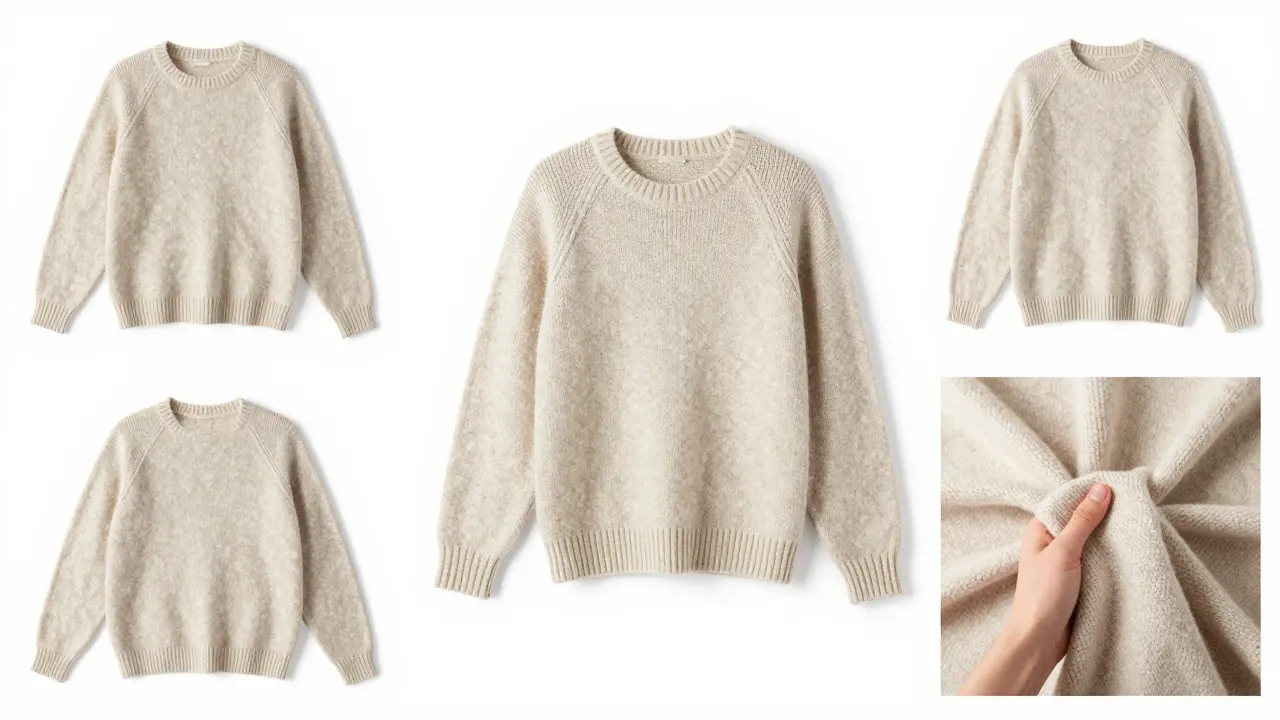
UK consumers are generally pragmatic. Unlike some markets where hyper-stylized, abstract imagery works, British buyers tend to prefer clarity and authenticity. They want to see the product clearly, understand its scale, and gauge its texture. If you sell a wool jumper, the photo needs to look soft. If you sell a stainless steel kettle, it needs to look sleek and durable. Mismatched visuals lead to skepticism.
Lighting is the first hurdle. Many UK homes and small offices have mixed lighting conditions-overcast daylight from windows mixed with warm artificial bulbs. This creates color casts that make white products look yellow or blue. Consistency is key. Your entire catalog should feel like it belongs to the same brand. If one shirt looks bright orange in one photo and dull red in another, customers will question the quality control of the rest of your inventory.
- Clarity over Creativity: Show the product as it is. Avoid heavy filters that alter color accuracy.
- Scale Context: Include a hand, a ruler, or a common object (like a coffee cup) to show size. UK sizes can vary slightly, so visual cues help prevent “too small” returns.
- Lifestyle vs. Studio: Use a mix. Studio shots for detail and consistency, lifestyle shots for emotional connection.
The Essential Gear: Keeping Costs Low
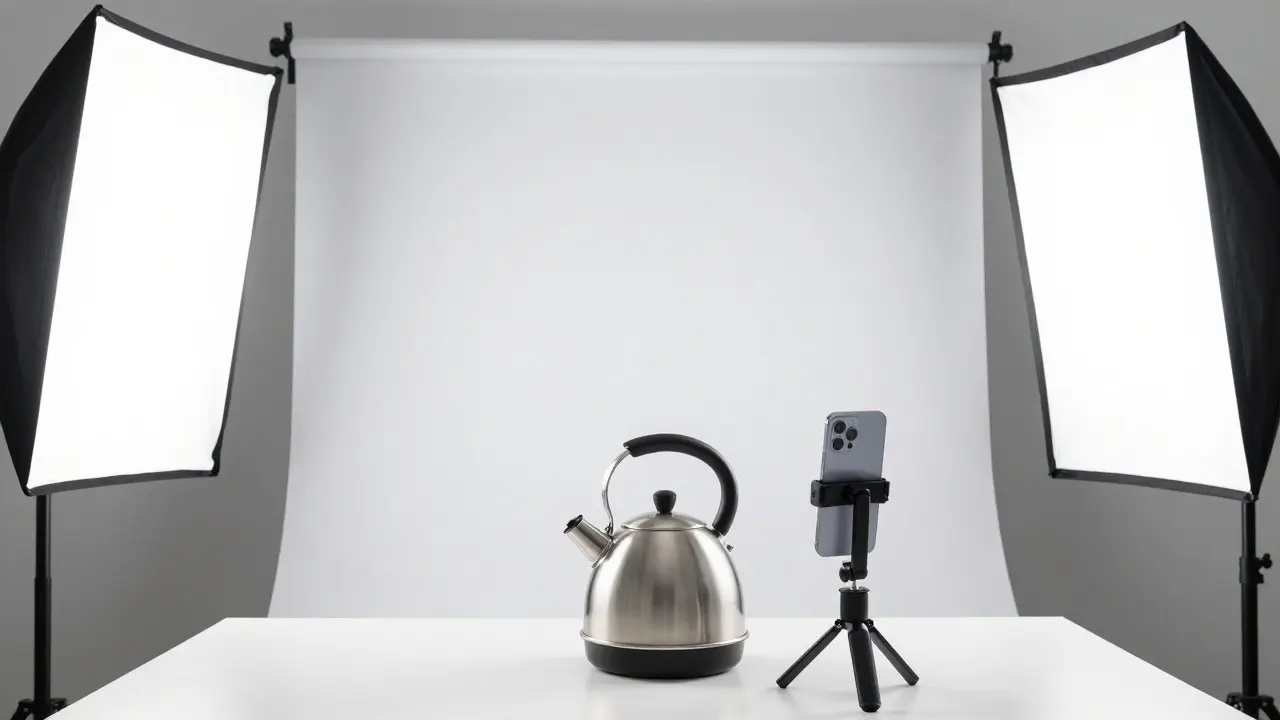
You do not need a £5,000 camera to start. Most modern smartphones, particularly those released after 2023, have sensors capable of producing high-resolution images suitable for web use. The trick isn’t the glass; it’s the light and the stability.
If you are shooting on a budget, here is what actually matters:
- A Tripod: This is non-negotiable. Shaky hands create blur, and blur kills credibility. A simple £30 tripod keeps your angle consistent across hundreds of photos.
- Diffused Light Source: Direct sunlight creates harsh shadows. Overcast days are great, but you can’t wait for weather. Use a window with sheer curtains, or invest in two cheap LED panels with diffusion sheets. Soft, even light flatters almost every product type.
- White Background Paper: Seamless paper rolls are cheap and easy to clean. They provide a clean, professional backdrop that makes the product pop. Avoid using a plain wall; texture and dust spots will ruin the shot.
- Remote Shutter Release: Even with a tripod, pressing the button on your phone or camera causes micro-vibrations. A £10 Bluetooth remote solves this instantly.
For clothing items, consider a mannequin or a friend who can hold the garment up. Flat lays work well for accessories, but hanging shots give a better sense of drape and fit. Remember, the goal is to reduce the cognitive load on the buyer. Make it easy for them to visualize owning the item.
Composition Techniques That Drive Conversions
How you frame the shot dictates how the customer perceives the value. A tight crop can make a product look premium and exclusive. A wider shot with negative space feels airy and modern. But there are rules of thumb that apply universally in Ecommerce Product Photography is the practice of creating high-quality visual content specifically designed to showcase products for online retail, focusing on accuracy, consistency, and appeal to drive sales.
The “Rule of Thirds” is useful, but for e-commerce, centering is often safer. Place the product in the middle of the frame. This ensures that when the image is cropped for mobile views or social media ads, the subject isn’t cut off. Leave enough “headroom” above the product so you can add text overlays later without covering the item.
Angles matter significantly. * Front View: The standard hero shot. Shows the main face of the product. * 45-Degree Angle: Adds dimension. Great for boxes, bottles, and shoes. * Top-Down (Flat Lay):strong> Best for jewelry, stationery, and food. Shows layout and details. * Detail Shots: Zoom in on textures, stitching, logos, or materials. These build trust in quality.
Don’t forget the background. While white is the industry standard for searchability, colored backgrounds can differentiate your brand. If you use color, keep it neutral or aligned with your brand palette. Busy patterns distract from the product. Think of the background as a stage, not a competitor.
Optimizing Images for Speed and SEO
Great photos mean nothing if they take ten seconds to load. UK internet speeds are fast, but mobile data usage is still a concern for many users. Large, uncompressed JPEG files bog down your site, increasing bounce rates. Google penalizes slow sites, which hurts your organic ranking.
Here is how to balance quality with performance:
- Compress Before Uploading: Use tools like TinyPNG or Squoosh to compress images without visible quality loss. Aim for file sizes under 200KB for standard product images.
- Use WebP Format: If your platform supports it, WebP files are significantly smaller than JPEGs while maintaining quality. Most modern browsers support this format natively.
- Descriptive File Names: Rename your files before uploading. Instead of `IMG_1234.jpg`, use `blue-cotton-t-shirt-front-view.jpg`. This helps search engines understand what the image is about, boosting your image SEO.
- Alt Text: Add alt text to every image. Describe the product naturally. “Handmade ceramic mug with floral pattern” is better than “mug.”
Consistency in image dimensions also helps. If all your product thumbnails are 800x800 pixels, your grid looks clean and professional. Mixed sizes create a chaotic, amateurish look that erodes trust quickly.
Common Mistakes to Avoid
Even experienced photographers make errors that hurt sales. Here are the most frequent pitfalls I see in UK online stores:
| Mistake | Why It Hurts | The Fix |
|---|---|---|
| Over-editing | Colors look unrealistic, leading to disappointment and returns. | Adjust brightness and contrast only. Keep colors true to life. |
| Inconsistent Angles | Confuses customers about the product's shape and size. | Create a shooting template. Use the same tripod height and distance for similar items. |
| Cluttered Backgrounds | Distracts from the product and looks unprofessional. | Use seamless paper or a clean, solid-color surface. |
| Poor Lighting | Harsh shadows hide details; dark images look low-quality. | Use diffused light sources. Shoot during the day near large windows if possible. |
| Ignores Mobile View | Images look blurry or cropped poorly on phones. | Preview your images on a smartphone before publishing. Ensure key details are visible at small sizes. |
One subtle mistake is forgetting to remove reflections. Glossy items like sunglasses, watches, or glassware pick up reflections of the photographer, the room, or the window. Use polarizing filters or black card stock to block unwanted reflections. It takes five minutes to fix but makes a huge difference in perceived quality.
Building a Repeatable Workflow
Photography shouldn’t be a one-off event. As your inventory grows, you need a system. Batch your shoots. Instead of taking one photo per new item, set aside a half-day each month to photograph all new arrivals. This saves setup time and ensures consistency.
Create a checklist for every shoot: 1. Clean the product (remove dust, fingerprints, price tags). 2. Set up lighting and background. 3. Take 5-10 angles per product. 4. Review on a larger screen immediately to check for focus and exposure. 5. Edit and compress. 6. Upload with correct metadata.
This routine turns photography from a stressful task into a manageable operational process. It also allows you to spot trends. Maybe your customers engage more with lifestyle shots? Maybe detail shots reduce inquiries about material? Data from your analytics can inform your future photography strategy.
Frequently Asked Questions
Do I need a professional photographer for my UK online store?
Not necessarily. For small catalogs or niche products, high-quality DIY photography is sufficient and cost-effective. However, if you are scaling rapidly, selling high-ticket items, or competing in crowded markets like fashion, hiring a professional for your hero images can pay off through higher conversion rates. Start DIY, upgrade when revenue justifies the cost.
What is the best resolution for product images?
Aim for a minimum of 2000 pixels on the longest side. This allows for zoom functionality without pixelation. However, ensure you compress the files to keep load times fast. A 2000px image compressed to under 200KB is ideal for most e-commerce platforms.
Should I use a white background for all products?
White is the safest bet for consistency and searchability, especially for marketplaces like Amazon or eBay. For your own website, you can experiment with light grey or brand-colored backgrounds to stand out. Just ensure the background doesn’t clash with the product color. If you sell colorful items, a neutral background works best.
How many photos should I take per product?
Five to seven is the sweet spot. This includes: front view, back view, side profile, close-up of details/textures, and one lifestyle shot showing the product in use. More than seven can overwhelm the customer; fewer than five may leave questions unanswered.
Is video important for product photography?
Video is becoming increasingly important. A 15-30 second clip showing the product in action, rotating slowly, or being used can significantly boost engagement. It’s especially effective for complex items or those with moving parts. If you have the capacity, add a short video to your top-selling items first.